Batch editing in Lightroom refers to the process of applying identical adjustments to multiple photos simultaneously, rather than editing each image individually. This functionality is especially beneficial for photographers who often handle large volumes of images, such as those taken during events, portraits, or travel. By streamlining the editing process, batch editing saves time and ensures consistency across images, which is crucial for maintaining a cohesive aesthetic.
Understanding the Basics of Batch Editing in Lightroom
How to apply edits to all photos in lightroom offers several foundational tools and features that facilitate batch editing. The Library module serves as the initial step for organizing and selecting images for batch edits. Photographers can easily import and sort their photos, allowing them to choose a series that reflects a particular theme or event. Once the desired images are identified, users can move to the Development module, where the real power of batch editing comes into play.
Within the Development module, photographers can leverage tools such as the “Sync” feature and the “Copy and Paste” adjustments capabilities. By setting the desired edits on one image, users can synchronize those settings across multiple selected photos, saving valuable time and ensuring consistent color grading, exposure adjustments, and tonal corrections. This is particularly advantageous in scenarios where a photographer may be working with a series of images captured under similar conditions, thus requiring uniform adjustments.
Moreover, batch editing is not solely limited to images from a single shoot; it can also be applied to different photos to achieve a unified look. For example, when curating a portfolio or a gallery, ensuring that images adhere to a similar visual theme through consistent edits helps to elevate the overall presentation. By understanding and utilizing the batch editing capabilities in Lightroom, photographers can significantly enhance their workflow efficiency and achieve professional-quality results with less effort and time investment.
Steps to Apply Edits to All Photos
To efficiently apply edits across multiple photos in Lightroom, it is essential to follow a structured approach. Start by selecting the images you wish to edit. This can be accomplished by holding down the Ctrl or Cmd key while clicking on the desired photos in the Library or Develop modules. Alternatively, you can select a contiguous range by clicking the first image, holding the Shift key, and then clicking the last image in the desired range.
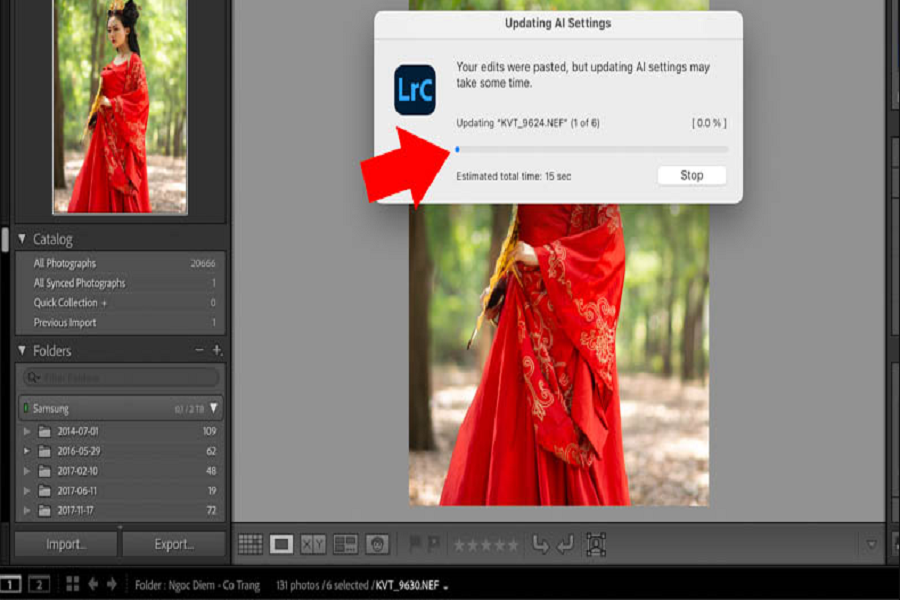
Once your images are selected, proceed to apply consistent edits using the ‘Sync Settings’ feature. To do this, first edit one photo with the desired adjustments, including exposure, contrast, color correction, and any other essential editing parameters. After completing your edits, ensure that this edited photo remains selected, and then navigate to the other selected photos. Click on the Sync button located at the bottom right of the interface and choose which settings to synchronize across all selected images. This feature provides an efficient means to ensure consistency in editing style across multiple photos.
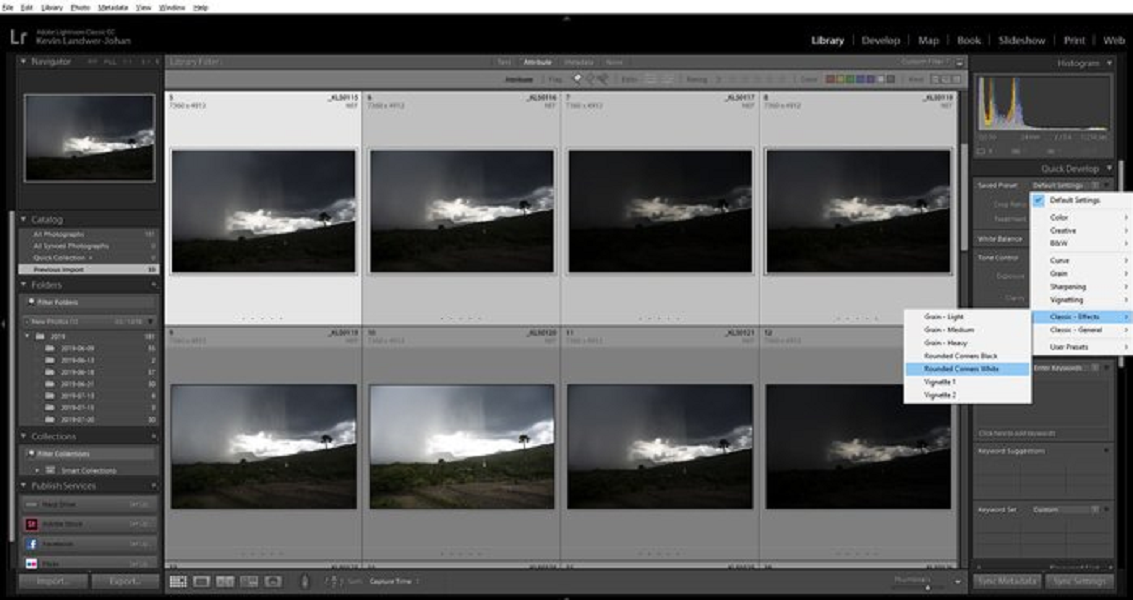
In addition to syncing settings, Lightroom allows the use of presets, which can further enhance your workflow. To save time and maintain a cohesive aesthetic, create your own preset or select from Lightroom’s extensive library of presets. Apply these choices by selecting the photos, and using the preset option to instantly transform their appearance with a unified editing style.
However, it’s important to note that while batch edits can save time, some images may require individual refining after syncing. Post-editing adjustments may be necessary to correct specific exposure levels or color balances on selected photos. To manage edits effectively and avoid common pitfalls, always review your batch-edited images and be prepared to make individual tweaks to ensure each photo meets your desired standard.
Related Articles: Edit photo delete background
Best Practices for Preserving Image Quality During Batch Editing
When engaging in batch editing in Adobe Lightroom, it is paramount to uphold the integrity of the original images while ensuring that the desired enhancements are seamlessly integrated. One of the foremost best practices is to understand the various file formats and their implications on image quality. JPEG files, while convenient for storage, are lossy formats that can degrade quality with every save. In contrast, working with RAW files preserves the fullest data captured by the camera, making them the ideal choice for subsequent editing, especially in bulk.
Another critical aspect to consider is resolution settings. Ensuring that edits maintain the highest possible resolution is essential for effective batch processing. Always verify that you are working with images set to their original resolution unless a specific project demands otherwise. Lowering resolution may lead to undesirable artifacts and loss of detail, especially important when images are intended for print or high-resolution displays.
Lightroom’s non-destructive editing feature allows changes to be applied without permanently altering the original file. Utilize this functionality to safely experiment with edits. It is advisable to create a collection or a set of virtual copies prior to initiating batch processing. This allows you to revert to the unedited versions if necessary. Furthermore, organize your edits by creating folders or using keywords to manage your workflow efficiently.
When exporting edited photos, it is essential to select the appropriate settings based on the final use—be it social media, web display, or print. Different platforms may require specific file formats and resolutions. Furthermore, implementing a robust backup strategy ensures that original images and edited projects are safely stored. This will safeguard your work against any unintentional changes that may occur during the editing process and provides peace of mind knowing your files are protected.